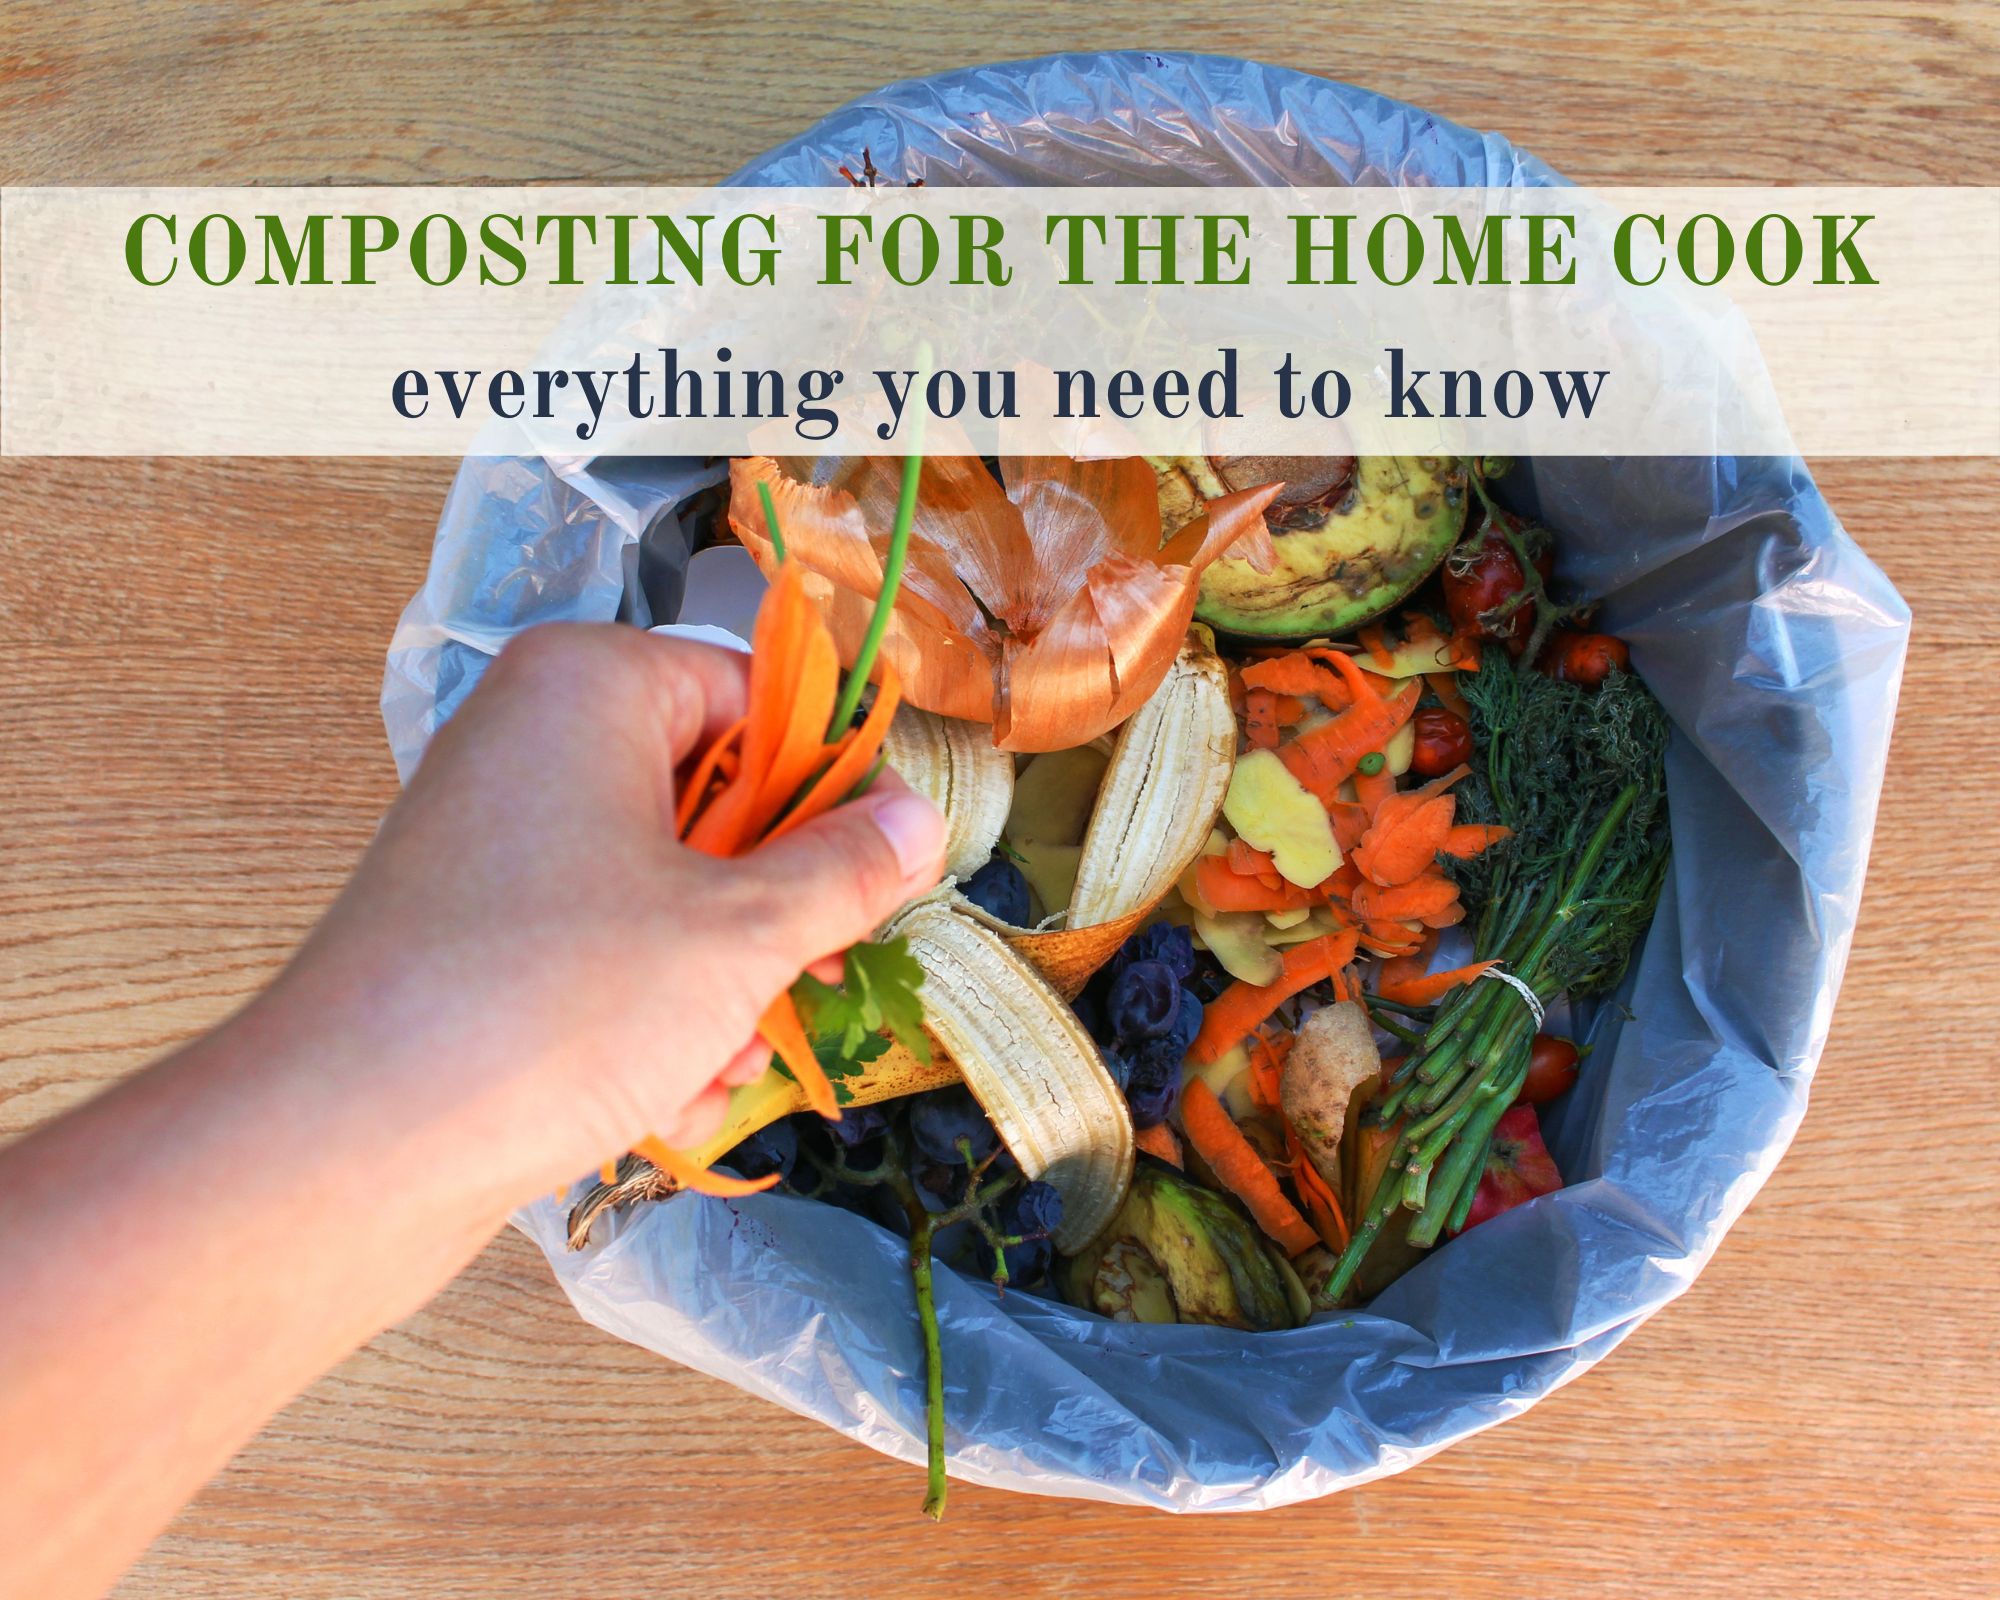
Have you ever wanted to start composting but just didn’t know where to begin? Well, you have come to the right place! We will explain everything you need to know, including step-by-step instructions to make it as easy as possible.
What is Composting?
Composting is a simple process that involves the natural decomposition of living or once-living materials by microbes, nematodes, fungi, and other soil organisms into their basic building blocks. Anything that was once alive breaks down eventually; composting simply speeds up the process. It helps recycle nutrients, nourishing the soils, plants, and organisms that grow in them in a sustainable and regenerative life cycle. And it just feels good to do it!
What Can and Can’t Be Composted?
All you need to be able to compost is food scraps, dead leaves or paper, water, and air to promote healthy aerobic (aka with oxygen) bacteria. You can compost anything that was once alive, with some minor cautions.
All vegetables, fruits, grains, nuts, and legumes can be freely tossed in your compost without concern. Mold or rot doesn’t matter; that’s what it does in the compost. Chop up the bigger pieces so they break down faster.
You can also include coffee grounds, tea leaves, tea bags (make sure they are paper, not plastic), any old spices or seasonings, sauces, cookies, candies, sweets, toothpicks and popsicle sticks, tissues, paper towels (not used with cleaning chemicals), paper, cardboard, greasy food containers (paper or cardboard only), and real wine corks (not the synthetic ones).
If you ferment your own kombucha, sourdough, beer, or wine, don’t forget to toss in all your great leftovers and byproducts from the process; their organisms can even help boost your compost! Just be careful about putting too much salty brine in there, or it may harm some of your beneficial microbes.
What About Meat and Dairy?
People often say you cannot add meat, bones, or dairy products to your compost. Technically speaking, that isn’t true at all. It was once living, so it decomposes. However, if you add meat or dairy, you should keep the portion of those ingredients low compared to veggie scraps, especially if you are dumping it outside in a bin or pile. The main problem is that as these products decompose, their odors will attract flies and animal scavengers who may tear up your compost and look for those scraps. It is also relatively high in nitrogen, so you must balance it with lots of carbon (see below), so you don’t harm the environment while trying to do good.
If you have a lot of meat and dairy scraps, one way to deal with them is to use a countertop composter that uses heat and stirring to speed up the process. You can break them down completely or just part-way, then toss them in with the rest of your compost without worrying.
Where Can I Compost?
Despite what many people think, you can literally compost anywhere! You just need to modify how you do it according to your available space or resources. Even if you have a small apartment, you have options.
If you have a balcony, you can use a 2-bin or 2-bucket system, one for fresh scraps and one that is finishing. If you don’t have a balcony, you can still use the bin or bucket system indoors, stirring it frequently to eliminate odors, or use one of those countertop composters.
If you have a yard, you have several additional options. Compost tumblers are great for those who live in moist or humid climates. Toss your scraps in and use the handle to spin it. This will stir and aerate the scraps, adding oxygen to speed up the process and reduce odors. You can get two tumblers or buy one with a divider in the middle, so you always have one for fresh scraps and one that is finishing.
Outdoors, another option is a larger 2-bin system, usually made of wood or posts with wire sides, or sometimes plastic barrels, where you have one active bin and one finishing bin. The most rustic and least effort method is the pile system, where you dump the compost on top of a pile and start a new pile when the first gets too full.
If you want to do “lazy composting” without aeration, it will take longer and is more prone to getting smelly anaerobic (aka without oxygen) bacteria. But it’s an option if you lack time and have lots of space. Since it takes up to a year to finish, depending on the size of your kitchen or household, you may want a 3-bin or 3-pile system: one for fresh scraps, one for finishing, and one for nearly finished.
Another lazy composting option is to bury it with the trench or dig-and-drop system. For the trench system, dig a 1-2 foot deep trench as long as you like, then start filling it at one end, putting some dirt over each addition to help hold moisture and odors in. Then, work your way down the trench until it’s full. Once full, return to the beginning of your trench and start digging up your finished compost and adding fresh scraps. The dig-and-drop method is even simpler. Go out and dig a small hole in your garden, drop the compost in the hole, and bury it. Next time, dig a new hole.
If you live in an arid or semi-arid environment, composting can be more challenging, but not impossible. Tumblers, bins, and piles will all dry out fast, especially if your climate is dry and windy. You can either be diligent about watering your compost regularly, even daily, during hot or windy weather or use the trench or dig-and-drop systems, which are slower but work the best with the least effort.
What Do Those Green:Brown and Wet:Dry Ratios Mean?
The ratios people often talk about are really the only ‘complicated’ part of composting. But it is a lot less complicated than you might first imagine. Even if you ignore this completely, you can still compost, but roughly following the ratios will help it decompose faster and with fewer smells.
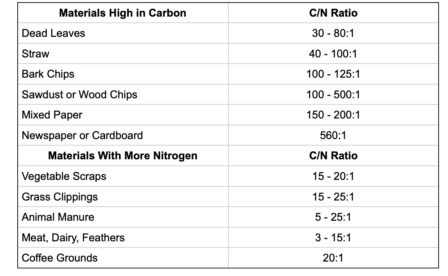
The problem with just tossing everything in your compost without paying attention to the ratio is because of limiting nutrients. The microorganisms doing most of the work in your compost require carbon (C) and nitrogen (N) to grow. Compost scientists say the ideal C/N ratio for their growth is 30:1 or 30 parts carbon to 1 part nitrogen. Another way of looking at it is that carbon is the ‘brown’ or ‘dry’ portion, things like dead leaves, bark, cardboard, paper, etc., and nitrogen is the ‘green’ or ‘wet’ portion, which includes moist fresh kitchen scraps, green leaves, grass clippings, etc. It’s not that the green portion doesn’t have carbon; it’s just that it’s also relatively high in nitrogen. So, when you add too much green, your microbes’ growth will be limited by the amount of carbon present, decomposition will slow, and nitrogen will be lost as ammonia gas, which gets very smelly.
The chart below gives you an idea of the C/N ratio of common compost ingredients. Don’t worry—you don’t need to weigh your compost or use your calculator to get the correct ratio! It’s much less complicated than that. But pay attention to the approximate ratios. So, whenever you add a load of fresh green/wet kitchen scraps, don’t forget to toss in a load of dead leaves, shredded cardboard, or newspaper to balance it out and nourish your microbes. Easy peasy!
Chart of Carbon/Nitrogen Ratios
What Else Does My Compost Need?
In addition to kitchen scraps and carbon materials, the only other ingredients are water and air.
MOISTURE IS KEY
Compost needs lots of moisture so the microbes can perform their magic. If they dry out, they die or go into a dormant state. So feel free to toss in unfinished tea or coffee, cooking water from boiling potatoes or vegetables, or rinse water from rinsing fresh vegetables. Then, you can be sustainable with your water while getting extra nutrients for your microbes. It’s a win-win!
If your kitchen scraps don’t have enough moisture, just water your compost like you would your plants. However, those using plastic bins or barrels without adequate drainage may deal with the opposite problem, so just keep an eye on them. If they are getting too wet, they will start getting smelly; in that case, add less moisture or more drainage.
AIR IS OPTIONAL, BUT BENEFICIAL
When you stir or aerate your pile, you encourage aerobic decomposition, which is way faster and produces little to no odors. Ideally, compost should be aerated once every three days. If you use enclosed bins or buckets in an apartment, you cannot use the lazy method; the semi-sealed containers will create foul odors unless you stir with each addition.
But if you don’t want to stir, rotate, or flip your compost, you can let it decompose more slowly. Just be aware that you may get some funny odors without adequate oxygen. The trench or dig-and-drop are the best no-stir composting methods because they are underground.
Step-By-Step Instructions to Start Your First Compost
Making a compost is easy!
1. Choose your container or spot by finding a system that works for you, your space, and your climate. Remember that you almost always need a minimum of 2 tumblers, bins, buckets, or piles so that you have one to which you keep adding fresh scraps while the other(s) continue finishing.
2. Add your kitchen scraps. If you have lots of meat scraps, consider using a mechanical countertop composter to reduce the odors.
3. Add your carbon, roughly following the guidelines from the chart above. Use dead leaves, shredded cardboard, paper towels (without chemicals), newspaper, etc.
4. Add water if your compost is looking dry at all.
5. Aerate if you want to speed up the process by stirring your compost; this is an essential step in any enclosed bins. You can skip this step if you are “lazy composting” in a bin or pile that is not sealed or if you are using the trench or dig-and-drop system.
6. Keep adding to your active compost, following the ratios, and adding additional liquids or water if your compost is dry.
7. When your active bin is full, empty your finished bin in your garden or offer it to a local farmer. Then, start using that one as your other one finishes.
That’s all there is to it! Happy composting!